Pigeon pose: do’s and don’ts
 ©foodspring - So geht's

Pigeon pose is one of the most common yoga poses because of how many benefits it can have. If you’re feeling stressed, inflexible, or tense, this hip stretch is an easy way to gently relieve your discomfort. Find out more below.
What is pigeon pose?
Pigeon pose, or eka pada rajakapotasana as it’s called in Sanskrit, is a yoga exercise that stretches the hip flexors and lower back. It’s practiced on the ground, with one leg back and the other knee forward—your hips should be anchored to the ground and your upper body should be straight. This exercise is a great hip opener that can improve your range of motion and also releases a lot of tension and stress in the body as a whole.
Though it might not seem like much when a yoga instructor does it, pigeon pose is not as gentle as it appears. The psoas muscle, or hip flexors, gets particularly stretched by this yoga pose, because sitting contracts the muscle. We really only use it when we walk or work out, so some people might find it especially tense if they spend a lot of time at their desk.
Benefits of the pigeon pose
From an evolutionary point of view, the psoas muscle is particularly important. Historically, when we were stressed or anxious because of a life threatening scenario, it was what helped us escape unsavory situations. The problem today is that it frequently doesn’t get enough use because we don’t have to fight or fly as much as our ancestors did. In fact, that’s why having overly tense psoas muscles is such a widespread problem today.
Disuse leads to extra tension, which makes the psoas muscle harder to stretch than most. Pigeon pose allows you to slowly open up the muscle, and release the ancestral stress and tension that is associated with it. In short, eka pada rajakapotasana is a great hip opener and relaxer to include in your yoga practice.
The benefits of pigeon pose include:
- Stretching the psoas muscle
- Stretching the gluteal muscles (medium and small)
- Stretching the upper chest
- Opening up the shoulder blades
- Promoting improved posture
- Relieving stress and tension
If you try to do a pigeon pose, but find that everything hurts and you can’t relax, turn the focus to your breathing and don’t overextend yourself. Move into the pose only as deeply as is comfortable for your body. If you begin to have trouble breathing, that may be a sign that you’re pushing yourself too far. Knee pain is also not a good sign, and there are simple modifications you can make if you’re dealing with previous knee injuries. You should also feel free to incorporate yoga blocks into the pose as necessary.
How to Do a Pigeon Pose
Though this pose looks simple, it can be difficult to do because of the tension in the hip flexors. Whether you find it hard or easy, focusing on your alignment — or where your joints are placed — is the most important thing to remember.
That your legs are placed correctly, your weight is evenly distributed, and your hips are straight and pointing forward will determine how much or how little you get from pigeon pose. If they are not straight, your lower back will be twisted and that may cause an injury over time if left unfixed.
The more your front knee is bent, the easier it will be to stretch your hip flexors. It’s more important to keep your hips straight than it is to have your shin parallel to the edge of the mat. If your hip joint doesn’t touch the floor, that’s no problem! Simply slide a blanket or a block under the hip joint of whichever leg is in the front. From there, you can gradually work on extending your upper body, lengthening your lower back, and opening your chest. Or you can focus on moving into more complicated versions of the pose if you prefer!

10 things to keep in mind:
- The back leg should be parallel to the edges of the mat.
- The front leg should be pointed straight forward and aligned with the hip (regardless of the bend of the knee).
- The front foot should be flexed and engaged.
- The back foot should be flexed and toes are resting on the ground.
- The outer hip should be placed on the floor.
- The thigh on the back leg side should be on the ground.
- The hips should be straight, parallel to the ground, and pointing forward.
- The lower back should be elongated and the hips activated.
- The shoulders should be pulled back.
- The eyes should be forward and chin parallel to the ground.
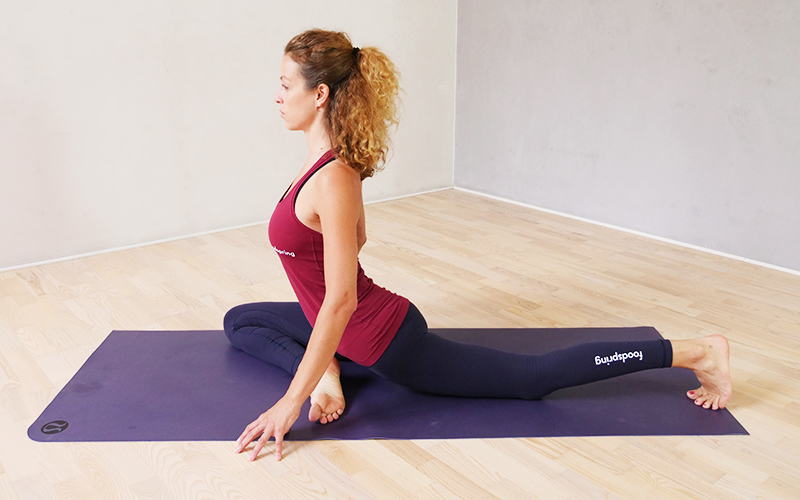
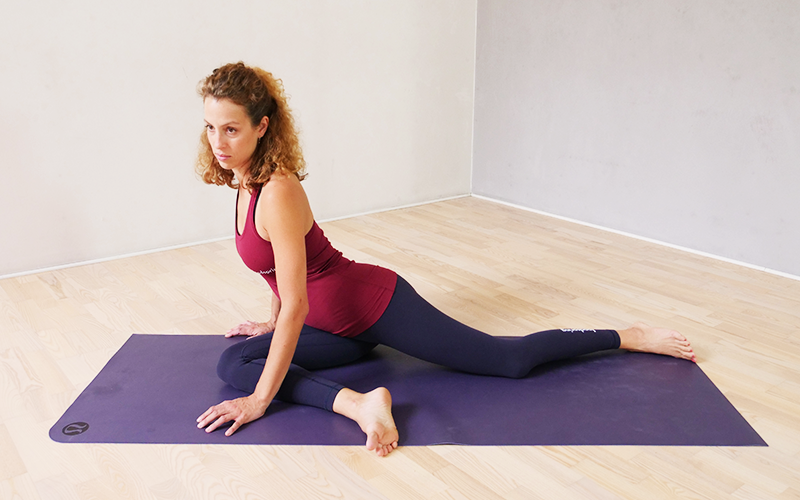
Pigeon pose – starting position
There are several different ways to begin this pose. Our favorite is to start from a plank position, with hands under shoulders and outer hips aligned with shoulders. From there, push up and bring the pelvis back by moving into a downward dog with your right leg extended backward (or three legged downward facing dog pose). Then, return to plank pose, this time moving your right knee forward into your chest. Finally place your right leg diagonally on the mat and your hip socket on the ground.
Get comfortable in this position (perhaps using a blanket or a block to prop up the front hip). Then stretch your left leg back, place the top of the left foot on the floor, keep your hips straight, and slowly raise your chest. If you feel like you can go further, extend your arms and fold over. Walk your hands forward and spread your fingers wide and sink into the yoga pose. This may be a bit uncomfortable at first, but you will gradually feel your hip joint open up and relax within a few minutes.
Alternatively, you can take the pose deeper by moving into another version known as king pigeon pose, which requires you to use both of your hands to pull your back foot forward towards your forehead. If you’re not familiar with king pigeon, give it a try in a yoga class first, where an instructor can ensure you aren’t making any mistakes.
Improving your habits outside of your yoga classes will also increase the benefits you get out of your practice. What you eat will impact how you perform, which is why we’ve developed plenty of products with no added sugar to help you reach your goals.
Pigeon Pose: Common Mistakes
| Mistake: | Crooked hips. |
| How to avoid it: | Bring your front hip slightly backwards. |
| Tip: | Think of your hips as headlights. They both need to shine in the same direction: forward! |
| Mistake: | Outer hip doesn’t touch the ground. |
| How to avoid it: | Place a blanket or block underneath the muscle to support it. |
| Tip: | Sit at a comfortable height so you can relax your hip. |
| Mistake: | Your legs and hips are out of alignment. |
| How to avoid it: | The legs and hips should form a straight line. |
| Tip: | The back leg and front thigh should be parallel to the edges of the mat. If you can’t do this, place a block under your outer hip to compensate. |
| Mistake: | Your back is too arched. |
| How to avoid it: | Tighten your abs and bring your belly button inward. |
| Tip: | Focus on your lower back. It should be relaxed. Contract your abs and feel the way it affects you back. Imagine that your spine is being pulled up as much as possible.. |
| Mistake: | Your shoulders are too close to your ears. |
| How to avoid it: | Raise your chest and roll your shoulder blades back. |
| Tip: | Raise your shoulders as high as possible, all the way up to your ears. Then, bring them back down as if you were a cobra. Raise your chest slightly and look forward. |
Pigeon pose: Our conclusion
- Eka pada rajakapotasana or pigeon pose is one of the best hip opening yoga poses.
- This pose can be difficult for a beginner or anyone who struggles with flexibility. If you find it easy, feel free to explore more difficult versions of the exercise.
- Proper placement is key to obtaining the benefits of this pose.
Sources for this article
We at foodspring use only high-quality sources, including peer-reviewed studies, to support the facts within our articles. Read our editorial policy to learn more about how we fact-check and keep our content accurate, reliable, and trustworthy.
Read more about
Related:

Calculate Your BMI: BMI Calculator & Chart