Yoga warrior pose: Increase your stability
 ©foodspring - So geht's

The various warrior poses are essential to most yoga practices because of the way they help develop flexibility and stability. Though they may seem straightforward, they’re surprisingly easy to do incorrectly. Here, we tell you all about the mistakes you might run into and how to correct them.
What is a warrior pose?
Yoga warrior pose, or Virabhadrasana in Sanskrit, is an umbrella term for three different poses that are designed to improve strength, balance, and flexibility. Each is a standing pose that requires intense coordination and focus and can be quite mentally and physically challenging. As a result, incorporating them into your practice on a regular basis can improve both the strength of your body and your mind, allowing you to better stay present in the pose and focus on your breathing. Over time, it may even make it easier for you to find inner peace outside of your mat, too.
Warrior I pose is an integral part of the yoga flow Ashtanga Sun Salutation B, or Surya Namaskar B, a fast-paced warm up that appears in many yoga classes. Warrior II pose is also essential to many other common flows. On the other hand, warrior III pose is more likely to appear in an advanced class than a beginner one. That doesn’t mean that the first two warriors are simple, though – if you perform them correctly, they’re anything but! In some cases, the poses can be so difficult that people may feel inclined to take shortcuts to ease their discomfort.
There are absolutely adjustments you can make to the pose to better suit your body and individual needs. However, incorrectly adjusting the pose puts you at a serious risk of getting hurt. Our advice: Learn this and every pose under the watchful eye of a yoga instructor, who can guide you through any modifications you might need, props to ease the strain, and the proper way to do them.
Warrior pose: The benefits
The three warrior poses are intensive exercises that engage the entire body. Though most of the work happens in the feet, legs, butt, and abs, you’ll be actively involved right down to your fingertips. Only your neck and shoulders should be relaxed at all times. Warrior pose helps develop strength, coordination, flexibility, and the ability to concentrate, as well as activating the metabolism and heating up the body. But each yoga pose has its own particular benefits. Here’s what you can expect.
Warrior I pose
- Relaxes shoulder and neck muscles.
- Stretches upper body.
- Improves upper spine flexibility.
- Improves arms, shoulder blade, and ab strength.
- Improves hip flexibility.
Warrior II pose
- Improves arm and shoulder strength.
- Opens shoulders, chest, and lungs.
- Activates the torso.
- Stretches hips and thighs.
- Strengthens legs, ankles, and feet.
Warrior III pose
- Improves feet, leg, and ab strength.
- Improves arm and shoulder strength.
- Improves intramuscular coordination and balance.
If you really want to get the most out of your yoga practice, incorporating healthy habits into the rest of your life is essential. For example, what you eat can have a big impact on your ability to perform. Plenty of nutrients and minimal added sugar is the key to feeling your best during a session. Not sure what to eat? We have plenty of nutritious recipe ideas for you to discover!
Here’s how to do warrior pose
The three yoga warrior poses are about more than simply going through the motions. Synergy of breath, mind, and body are essential to getting the most out of them. Because they can be quite difficult, we tend to approach them with a lot of stiffness. If you’re dreading warrior pose, your body is likely to be tense as a result, which will make it both harder to perform and more uncomfortable when you’re in it.
It’s important to embrace the discomfort during these yoga poses rather than shying away from it. Avoid thinking about when the pose will end and turn your attention to the moment at hand. You’ll only be able to get the most out of these poses when you’re stable, calm, and centered, and you’ll find that they’re easier to do when that is the case!
As with any other physical activity, you need to remember that your body and needs are unique to you. What works for some during yoga may not work for others, and the key with any yoga pose is to avoid overextending yourself. Your breath is one great indicator of whether or not you’re doing that. If you begin to have difficulty breathing, that’s likely a sign that you should slow down, maybe even taking a break with the child’s pose. The better you are in harmony with your breathing, the more stable you will be.
Think of trees rustling in the wind. Their branches can whip around in fierce winds, but their trunks always remain stable and rooted to the ground. If the branches were rigid, they would snap off and die. During the warrior poses and your asana practice in general, the goal is to be like the tree – fluid, yet grounded.
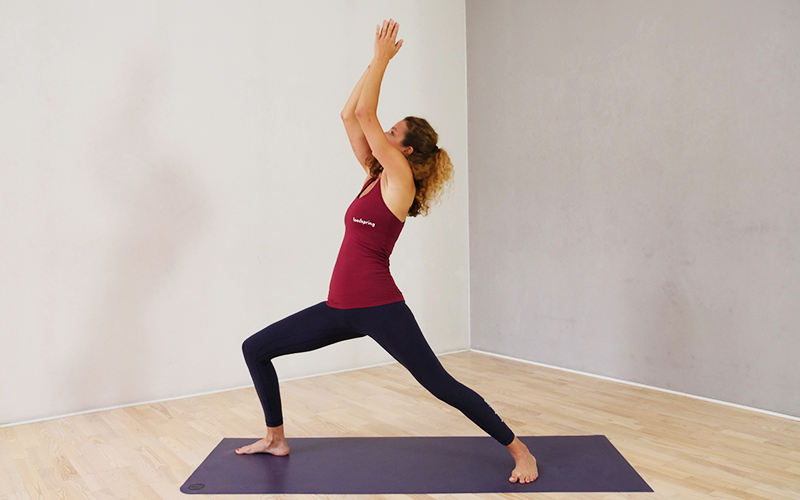
Warrior I pose – How to get started
In the photo below, yoga teacher Jenny demonstrates a perfect Warrior I pose. In this asana, it’s important that the hips are pointed forward and the back foot is turned at a 45° angle. If you’re recovering from an injury or have a preexisting condition that makes it difficult to move your body in this way, try placing the back foot parallel to the mat. Leave only the tip of the foot on the floor and try to press your heel into the mat.
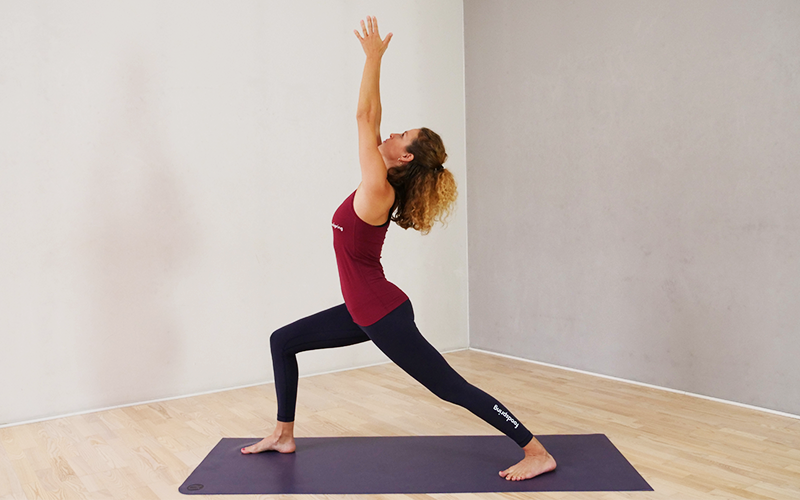
Warrior I pose checklist
- The back foot points outward at a 45 degree angle.
- The outer side of the back foot remains firmly planted on the ground. The leg is fully extended backwards.
- Hips are pointed forward.
- The front knee forms a right angle and is placed directly over the ankle (whether seen from above or from the side).
- The arms are lifted up.
- The shoulders are relaxed away from the ears.
- The rib cage is pointed slightly forward.
- The gaze is aimed at the thumbs.
- The belly is slightly stretched and the lower back is extended.
Warrior I: Common mistakes
| Mistake: | Shoulders are touching ears. |
| How to avoid it: | Drop shoulder blades backwards and downwards. |
| Tip: | Practice step by step: When you’ve adjusted your feet and hips, drop your shoulder blades and extend your stomach. Place your arms in front of you, lower your shoulders a little more, then raise your arms back up. |
| Mistake: | The back leg isn’t straight. |
| How to avoid it: | Plant the outer edge of your back foot firmly into the mat and activate your inner thigh. If you’re using a variation with your foot and heel slightly raised, push your heel firmly backwards. |
| Tip: | Tightening your leg is a matter of habit. You may have to remind yourself each time to keep it stretched. Before you know it, you’ll be doing it automatically. |
| Mistake: | Back is overarched. |
| How to avoid it: | Tighten your stomach and pull your belly button towards your spine. This will cause the pelvis to tilt forward and activate pelvic floor muscles. |
| Tip: | Put a hand on your lower back and the other hand on your pelvis. This lets you feel the effect of the ab tension and pelvis tilting on your lower back. |
| Mistake: | Front knee isn’t bent. |
| How to avoid it: | Bend your knee until it’s just above your ankle. |
| Tip: | Make sure to keep your back leg straight. |
| Mistake: | Front knee is bending inwards. |
| How to avoid it: | Turn your thigh outward. Use your abs and glutes to control the rotation. |
| Tip: | You should be able to see your big toe slightly beyond your knee. |
Not sure if you’re flexible enough? Our 10 flexibility exercises will help you become a little more flexible every day. Before you know it, you’ll be flexible enough for each warrior pose.
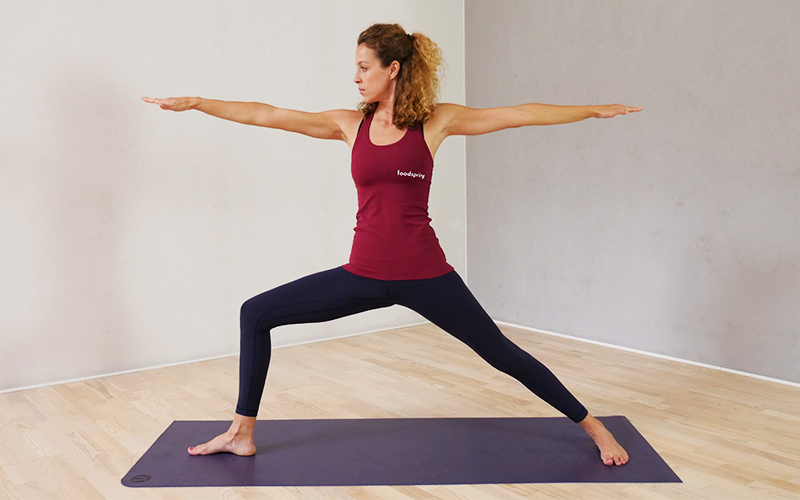
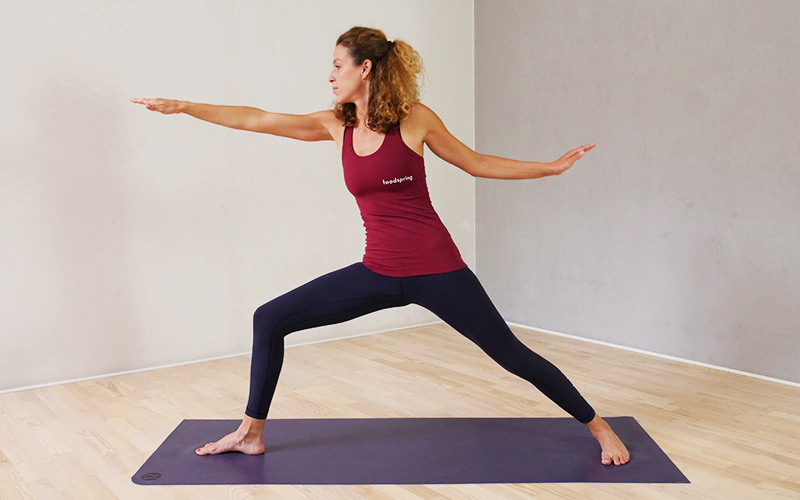
Warrior II pose – How to get started
Warrior II is a difficult pose that engages your whole body. Here’s what you need to know before you try it.

Checklist for II pose
- The back foot points outward at a 90 degree angle.
- The outer side of the back foot remains firmly planted on the ground. The back leg is fully extended.
- The hips are facing outward.
- The front knee forms a right angle with the ankle (whether seen from above or from the side).
- The torso is in line with the hips and turned to the side.
- The belly button is pulled in towards the spine, the lower back is extended, and the pelvis is activated at all times.
- The shoulders are relaxed away from the ears.
- The arms are extended outward, parallel to the ground. They should form a line.
- The gaze is directed towards the middle finger of the front hand.
Warrior II pose: Common mistakes
| Mistake: | Back leg isn’t extended |
| How to avoid it: | Plant the outer edge of your foot into the mat and activate your inner thigh. |
| Tip: | Remembering to fully extend your leg will take time. Keep reminding yourself and it will eventually happen automatically. |
| Mistake: | Front knee is not bent. |
| How to avoid it: | Bend your knee until it’s just over your ankle. |
| Tip: | Make sure your back leg stays straight. |
| Mistake: | Front knee bends inwards. |
| How to avoid it: | Turn your thigh outward. Use your abs and glutes to control rotation. |
| Tip: | You should be able to see your big toe slightly beyond your knee. |
| Mistake: | Back is overarched. |
| How to avoid it: | Tighten your stomach and pull your belly button towards your spine. This will cause your pelvis to tilt forward and activate your pelvic floor muscles. |
| Tip: | Put one hand on your lower back and one hand on your pelvis so you can feel the effect moving your belly button inwards has on your lower back. |
| Mistake: | Back arm falls down. |
| How to avoid it: | Tighten your arms at the same level. |
| Tip: | We often forget what we can’t see. During this asana, be sure to keep your focus and concentration on the whole body. |
| Mistake: | Shoulders are tense. |
| How to avoid it: | Relax both shoulders downwards. |
| Tip: | Turn your palms 180 degrees so that they’re facing the ceiling. See what effect this has on your shoulders. Then, without moving your shoulders, turn your hands over so your palms face the floor. |
Warrior III pose – an advanced asana
Warrior three pose is especially complicated because it requires a lot of balance. Give this pose a try for the first time under the guidance of a yoga instructor who can direct you through the proper motions and ensure your form is in tip top shape.
Warrior III pose – how to get started
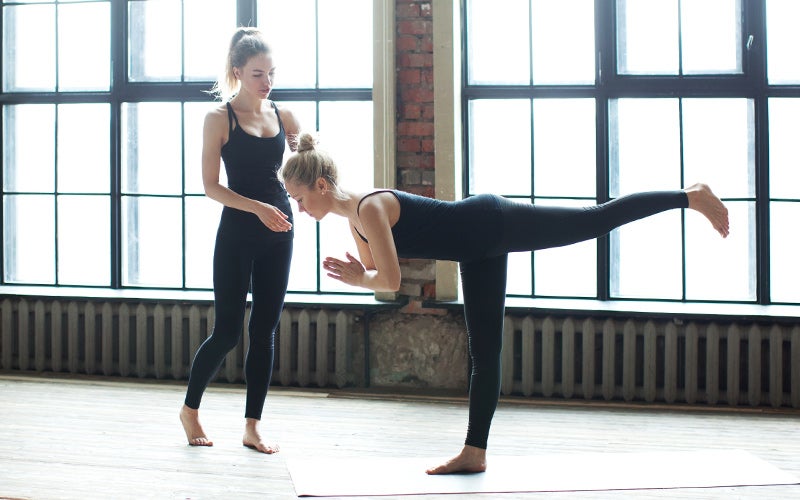
- The supporting leg is straight, but the knee is not completely extended.
- The back foot is flexed.
- The hips are straight and pointing forward.
- The belly is outstretched and the lower back is straight.
- The forearms are close to the body and palms come together.
- The shoulders are away from the ears.
Sources for this article
We at foodspring use only high-quality sources, including peer-reviewed studies, to support the facts within our articles. Read our editorial policy to learn more about how we fact-check and keep our content accurate, reliable, and trustworthy.
Read more about
Related:

Test Article EN Source 27/10/2022 by Florian

Work Your Core with an Abdominal Wheel