How to do a handstand – 9 steps to flip your world over
 ©foodspring
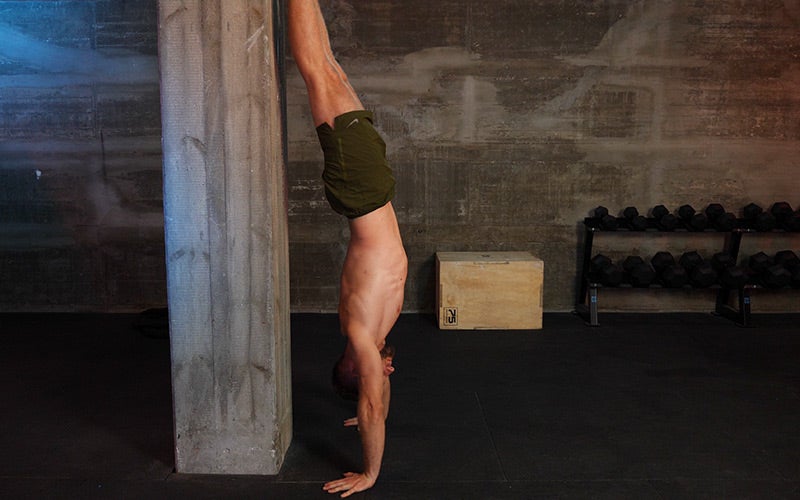
Handstands are one of the most important skills used in advanced bodyweight training. To do one successfully, you need upper-body (arm) strength and a solid core, flexibility in your hands, and stability in your arms and shoulders. Simply put, you need to use and coordinate your whole body.
If you want to work on this skill, one thing’s clear: trying to jump into it out of nowhere is very frustrating for beginners. Generally, it’s probably not going to happen.
Learning how to do a handstand requires a lot of dedicated practice with a clear, alert mind. You won’t get anywhere if you’re distracted. Our Energy Aminos contain a lot of natural caffeine from guarana for a focused and clear head. Plus, it’s got BCAAs for your muscles.Discover Energy Aminos
A few of our simple tips can help you learn how to do a great handstand. Here they are:
How to learn to do a handstand
The best way to master a handstand is to progress through the following exercises. When you feel confident in one exercise, you can move on to the next.
1. Mobilize your wrists and shoulders
When you’re doing a handstand, you’re bearing your full body weight on your hands. So, in order to avoid any injuries, it helps to warm up your wrists. To do this, try slowly stretching and rolling out your wrists before you start.

Your shoulders also have to work hard to keep your body stable, so it’s important to include exercises for your shoulder mobility to keep your joints supple and thus more resistant to higher loads.
2. Build strength in your arms and shoulders by doing push-ups
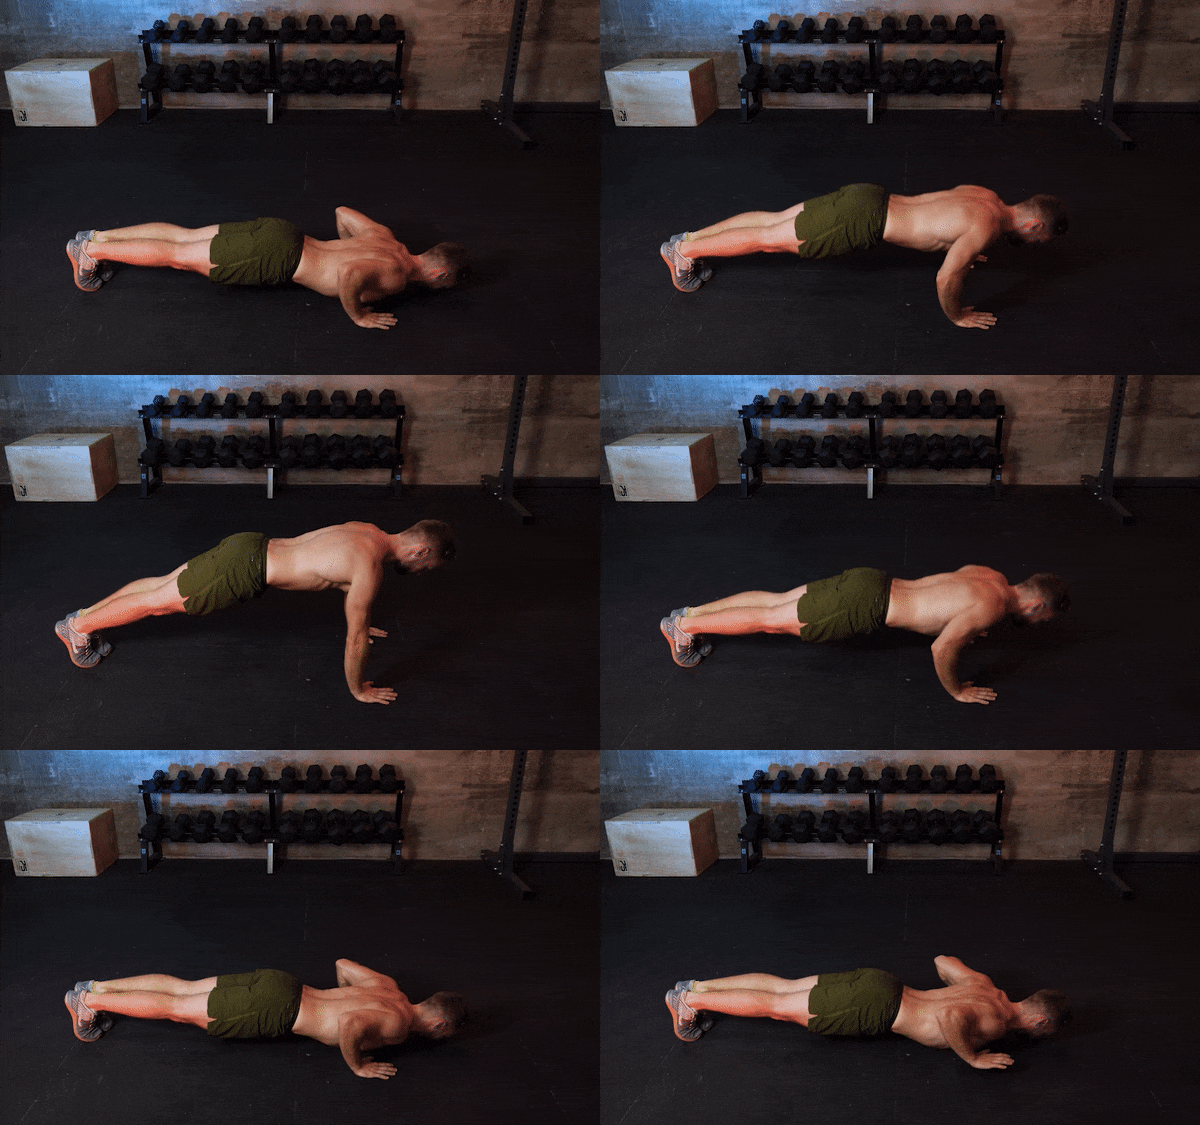
No muscle, no stability. This is especially true for your handstand. Agility and coordination are important, but your muscles also need to be powerful enough to hold your body up. If you’re just starting out, normal push-ups get the job done. But to train your flexibility at the same time, lay down push-ups are even better. At the bottom of each push-up, set your body down on the floor, lift your hands a few inches off the floor, and then push yourself back up.
3. Peak push-ups
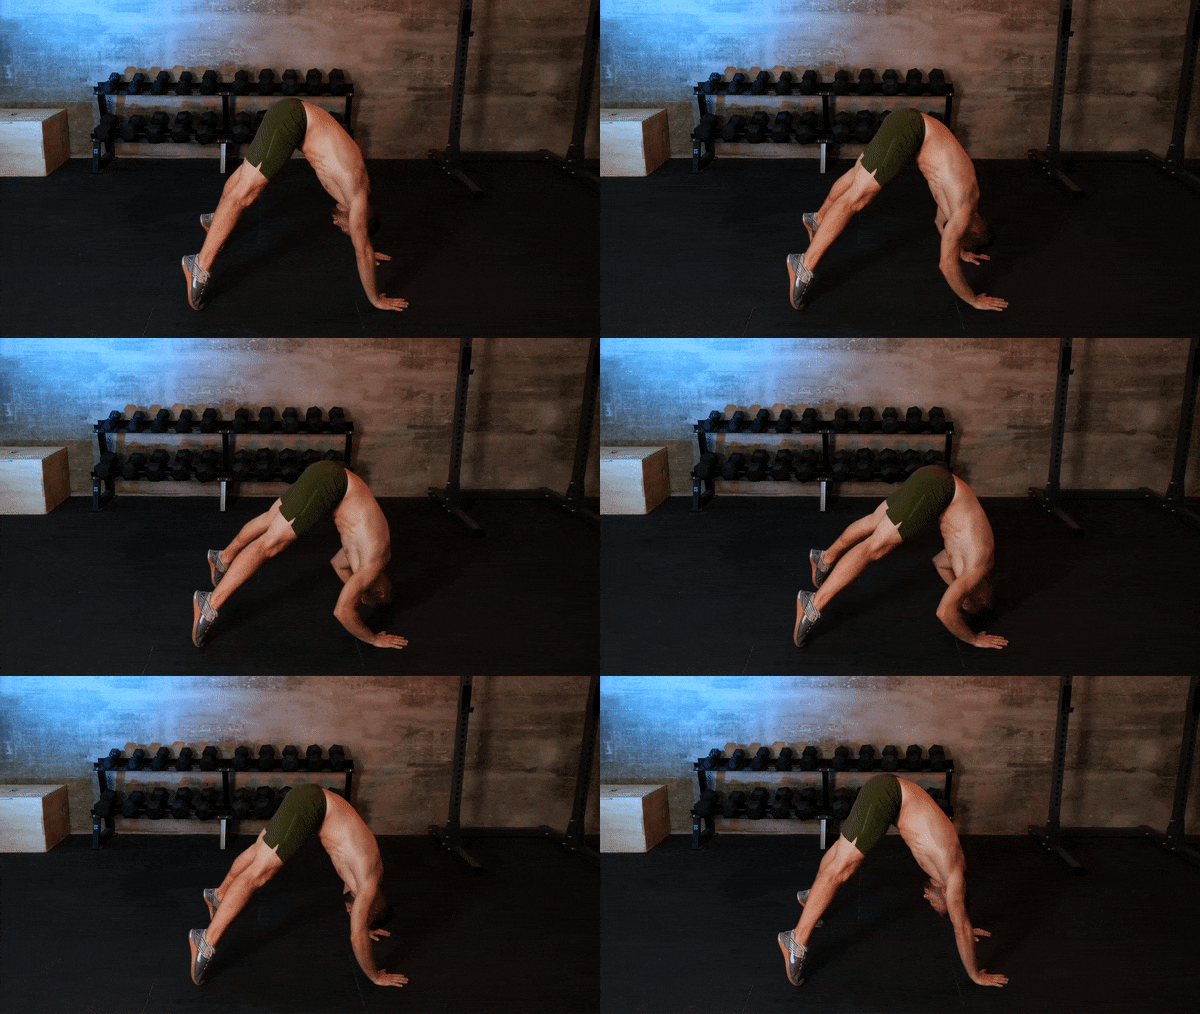
If you can manage 20 push-ups, challenge yourself with a more difficult variation: the peak push-up. Bring your hands and feet closer together and your glutes higher in the air. Optimally, your body should now form a triangle with the floor. Now make a push-up movement with your arms, keeping your glutes high to the sky.
Exercises like the peak push-up can be very strenuous. In order for your muscles to recover quickly, they need sufficient protein. That’s why a well-balanced, protein-rich diet is essential in order to achieve your goals.
Our Whey Protein provides a quick and easy way to get protein after your workout. Simply pour water or milk into the shaker. Add Whey Protein. Put the lid on. Shake. That’s it.discover Whey Protein
4. Engage your core with the hollow body hold and hollow rocks positions
An exercise that you can try alongside those push-ups is the ‘hollow body’ static hold. Together with strength and flexibility, good core stability is critical to holding a proper handstand.
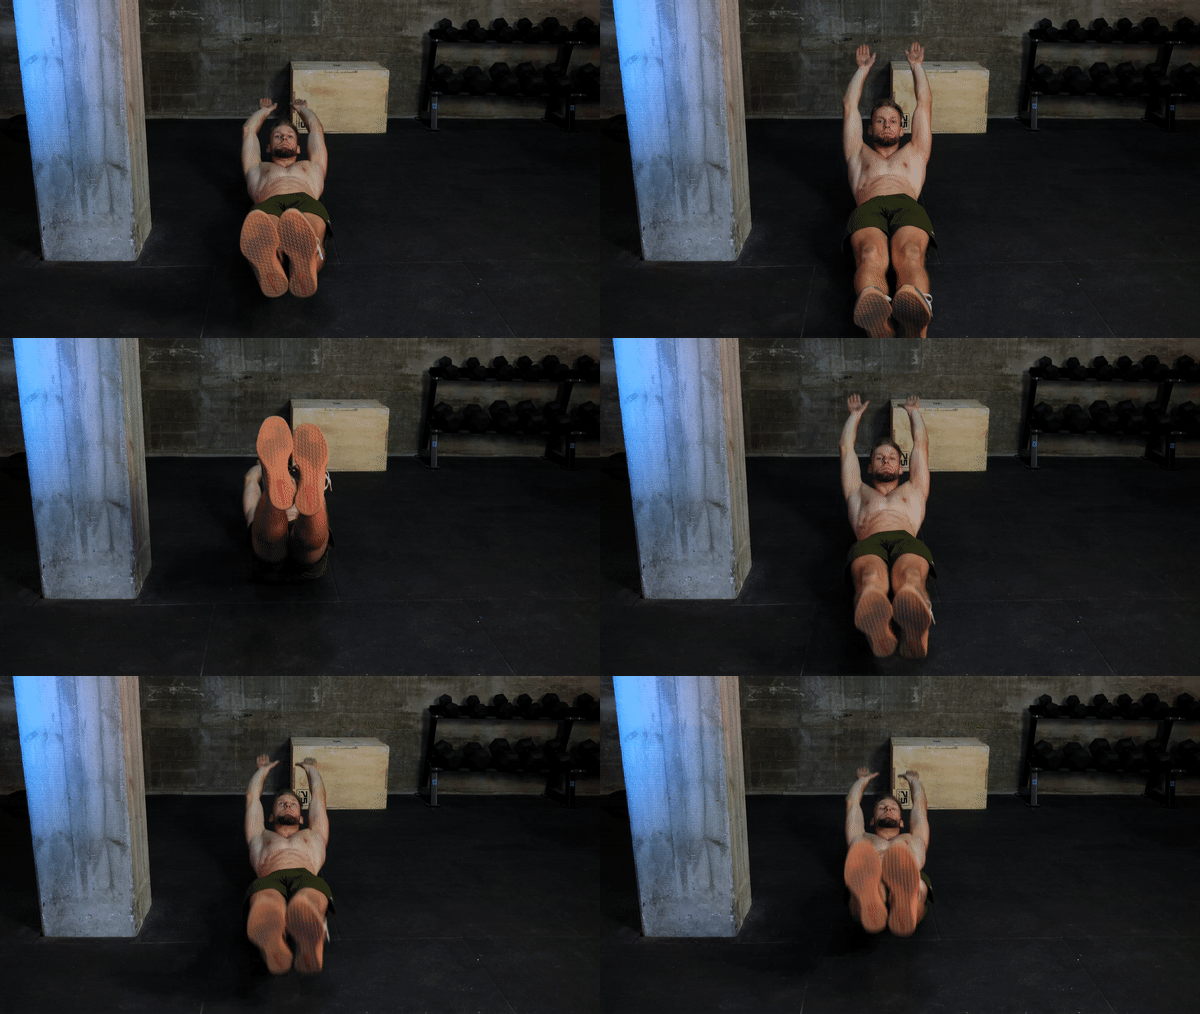
To do this, lie on your back. Extend your legs and lift them slightly off the ground. At the same time, extend your arms back over your head. Now contract your abs so your lower back is flat against the floor. Hold this for 20 seconds and repeat for 3 sets.
Once you’ve gotten the hang of this, you can increase the difficulty a bit. You can do this by doing some “hollow rocks.” Once you’re in your hold, start rocking back and forth without changing your posture.
Our tip: Like handstands, pull-ups are a powerful bodyweight training exercise. If you can’t do pull-ups yet, check out our article with 6 exercises to get you there.get the hang of pull-ups
5. Wall walk
You’ve worked on your strength, agility, and core stability. Now you need to combine these 3 skills to climb into your first handstand. Initially, it’s just a matter of getting used to the unfamiliar, upside down orientation of your body.
The easiest way to learn is to go step by step. Start with a push-up position with your feet placed against a wall. Next, move your hands slightly towards your feet, like you would for the peak push-up.
Now, walk your feet up the wall and you’re in your first handstand! The more you get used to this position, the closer to the wall you can start to place your hands.
6. Rolling out
As you can see, there are many small intermediate steps to work yourself up to a handstand. You’re so close to your goal.
Maybe at this point you’ve already tried to do a handstand, but you’re still afraid to get your legs off the wall.
You’ll gain confidence when you feel sure that you can’t hurt yourself doing it – just like when practicing your yoga crow pose. The easiest way to do that is to learn how to roll. Again, start easy and build up to it.
First, practice squatting from a standing position and doing a forward roll.
Too easy for you? Then go from a standing position into a peak push-up. Hop off the ground just a little bit with your feet to roll out of it.
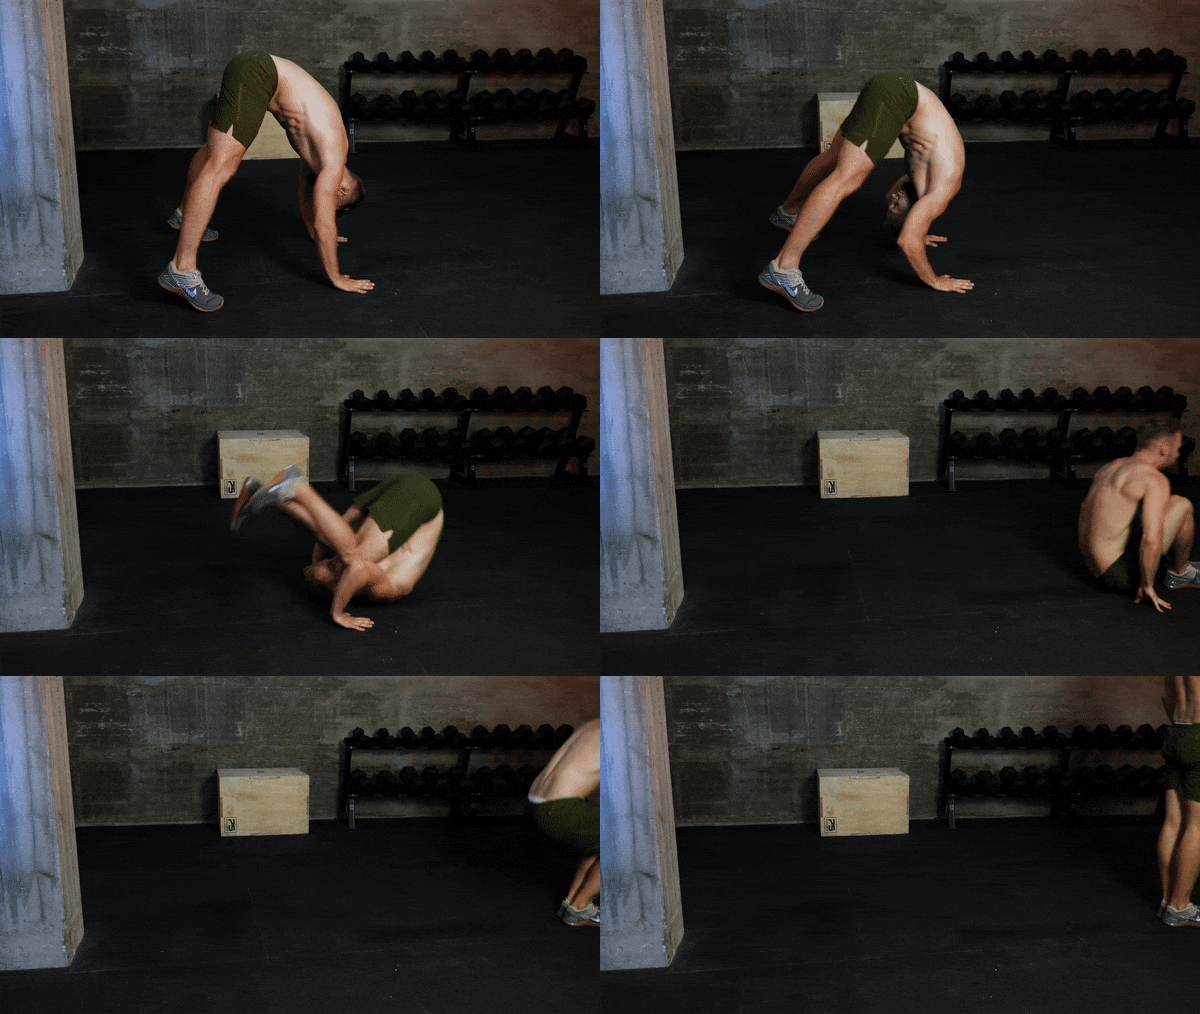
The more comfortable you feel with this movement, the better. Gradually start jumping a little higher before you roll. If you want, try jumping off with one leg.
7. Shoulder taps
The most important thing when learning handstands is your balance. You can be as strong as you want, but if you can’t keep your balance, it won’t do you any good.
To further focus your balance, go back to your wall handstand. Keeping your abs towards the wall, move your body close enough to the wall to keep you stable. Now shift your weight between your left and right arms and reach for the opposite shoulder with each hand.
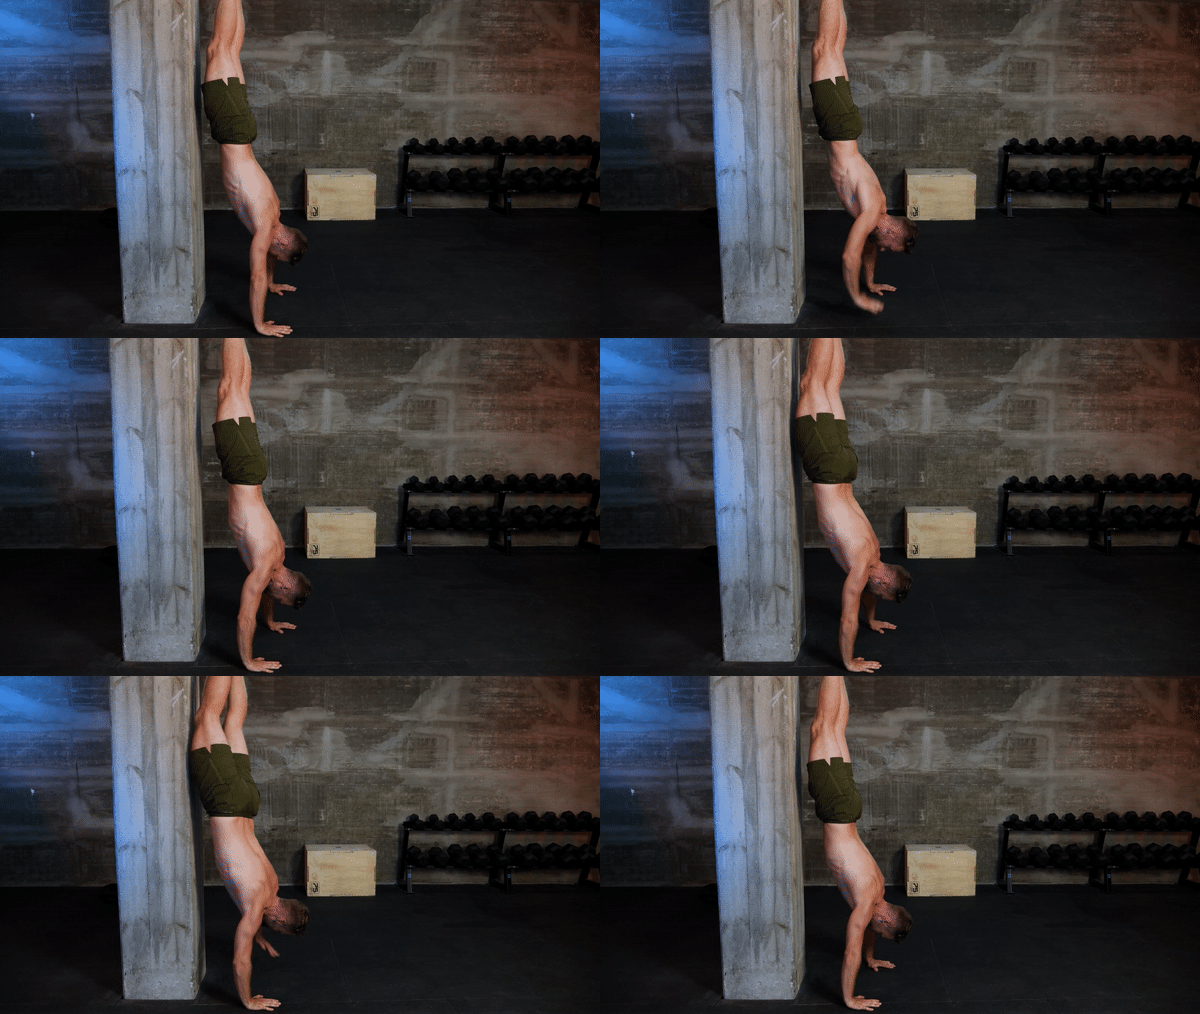
8. Standing with your abs and back against the wall
If you have mastered the previous exercises, it’s time for the second to last one: alternate your handstand with your belly and your back facing the wall.
This time, however, try to get as close to the wall as possible. Again, make sure you are pressing your shoulders firmly, and that your elbows are fully extended. Otherwise, you’ll be too unstable.
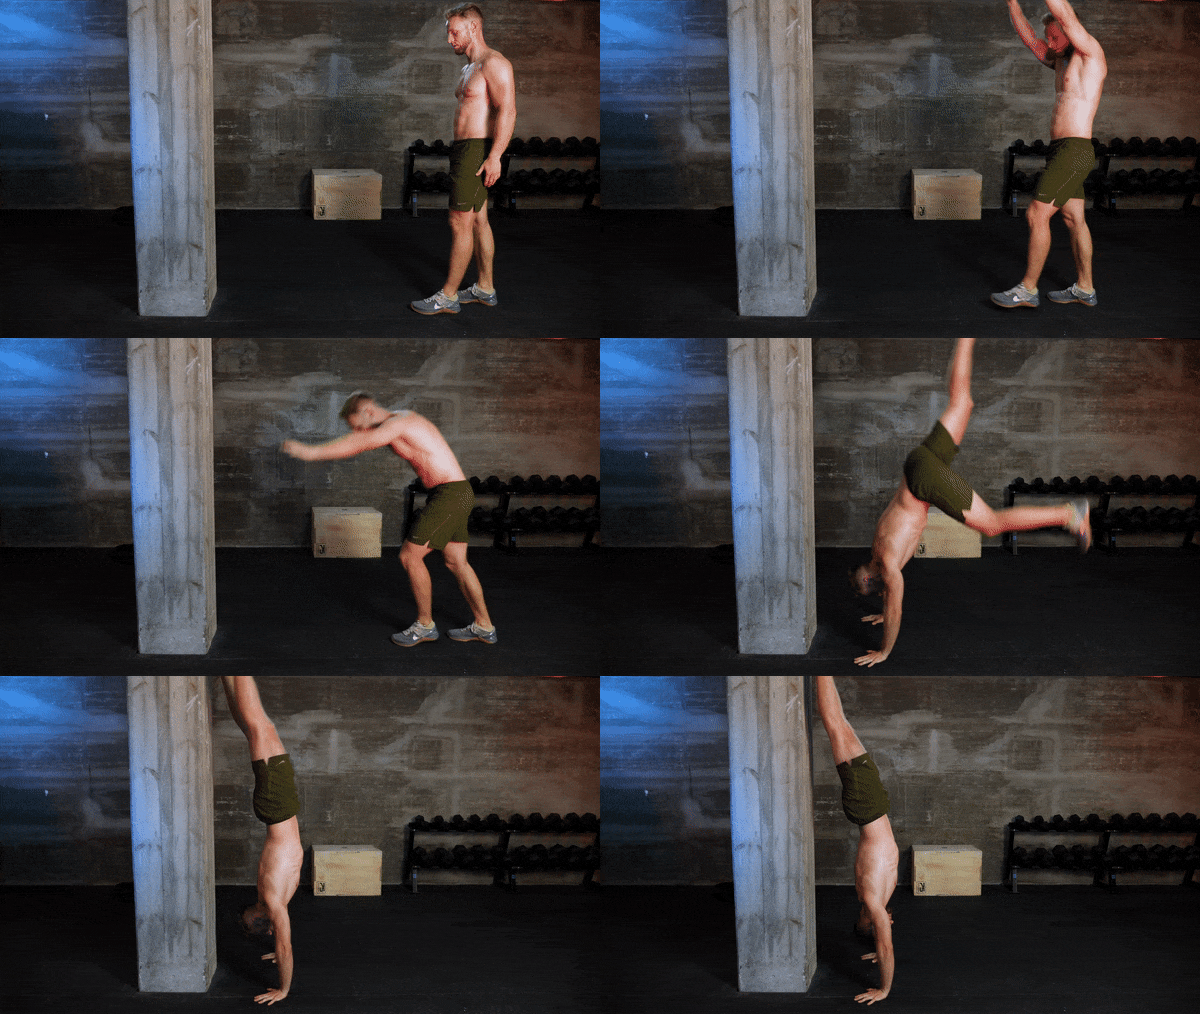
9. The free handstand
You’ve nearly made it! Find a place where you have enough space and will have a soft landing if you happen to fall. Now place your hands on the floor in front of you and swing one leg up to start the handstand. Try to hold yourself up.
In the beginning it still might be difficult to find the right position. Maybe you can’t get high enough, or maybe you swing your legs with too much momentum. If so, just roll down as you’ve learned, and you’ll figure it out soon.
Keep remembering to press from your shoulders and to straighten your elbows.
Another little tip: spread your fingers as much as you can. This will increase the area over which you can shift your weight, which will help you keep your balance.
Summary
Tackling handstands is a long process that doesn’t just happen overnight. But with enough handstand practice and our 9 steps, you’ll be well on your way to achieving your goal in a matter of weeks!
Sources for this article
We at foodspring use only high-quality sources, including peer-reviewed studies, to support the facts within our articles. Read our editorial policy to learn more about how we fact-check and keep our content accurate, reliable, and trustworthy.


